吕梁市网站建设_网站建设公司_网站备案_seo优化
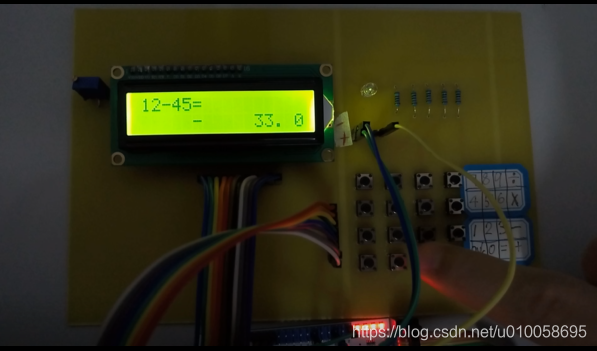
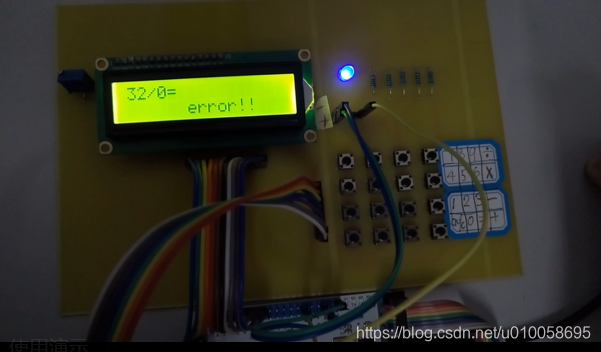
用FPGA生成一个32位的MCU软核,生产相应的管脚和资源,在MCU里边用C完成计算器的逻辑和LCD1602、矩阵键盘的编写。2016年的古老存货。
一、硬件和开发环境
- FPGA:EP4CE6E22C8
- LCD1206液晶,4X4矩阵键盘。
- quartus 13
- project_FPGA_NO10.zip
二、具体步骤
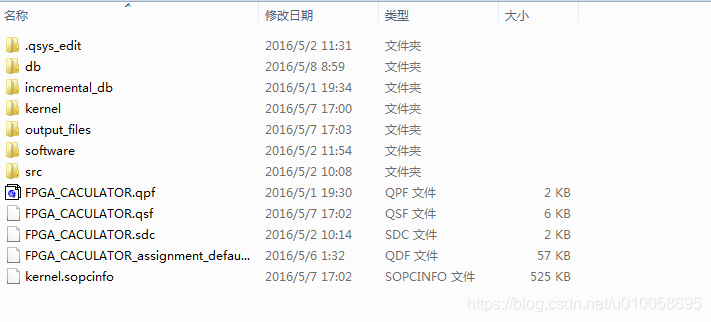
将工程文件解压到不含中文字符的路径下。文件包括一下内容:
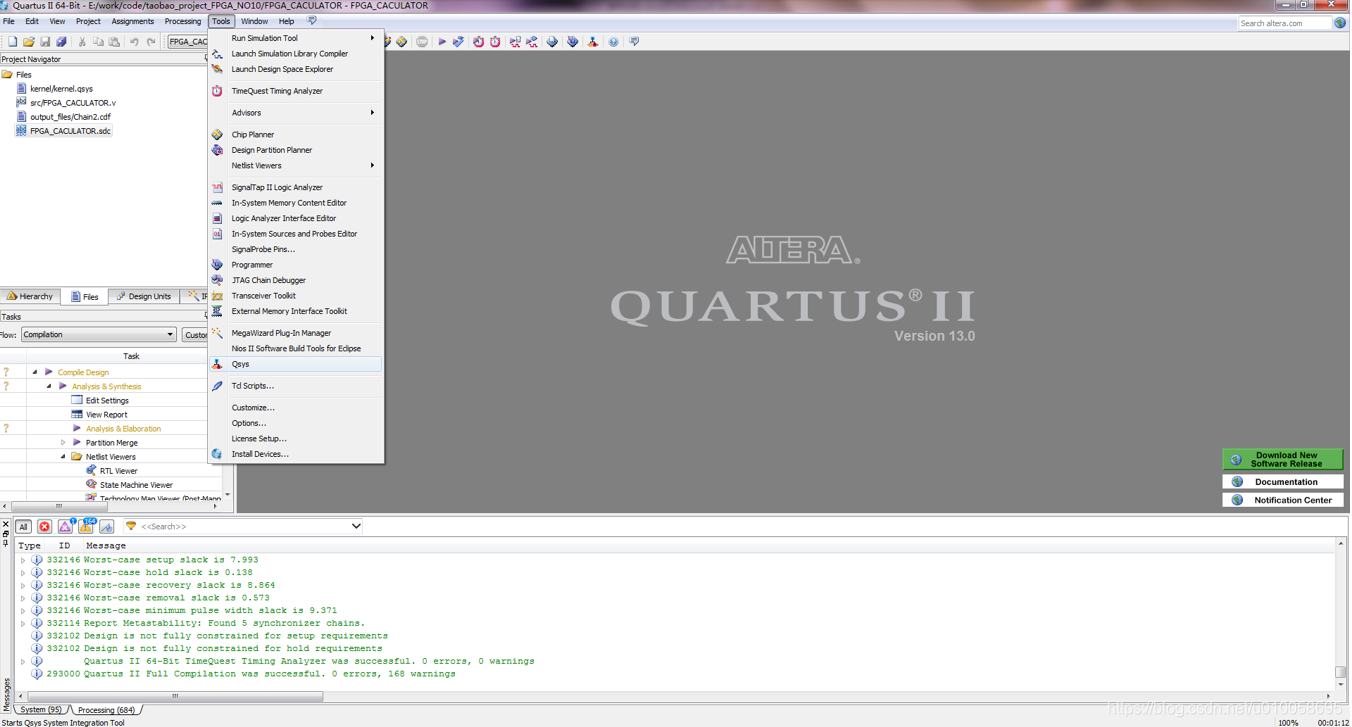
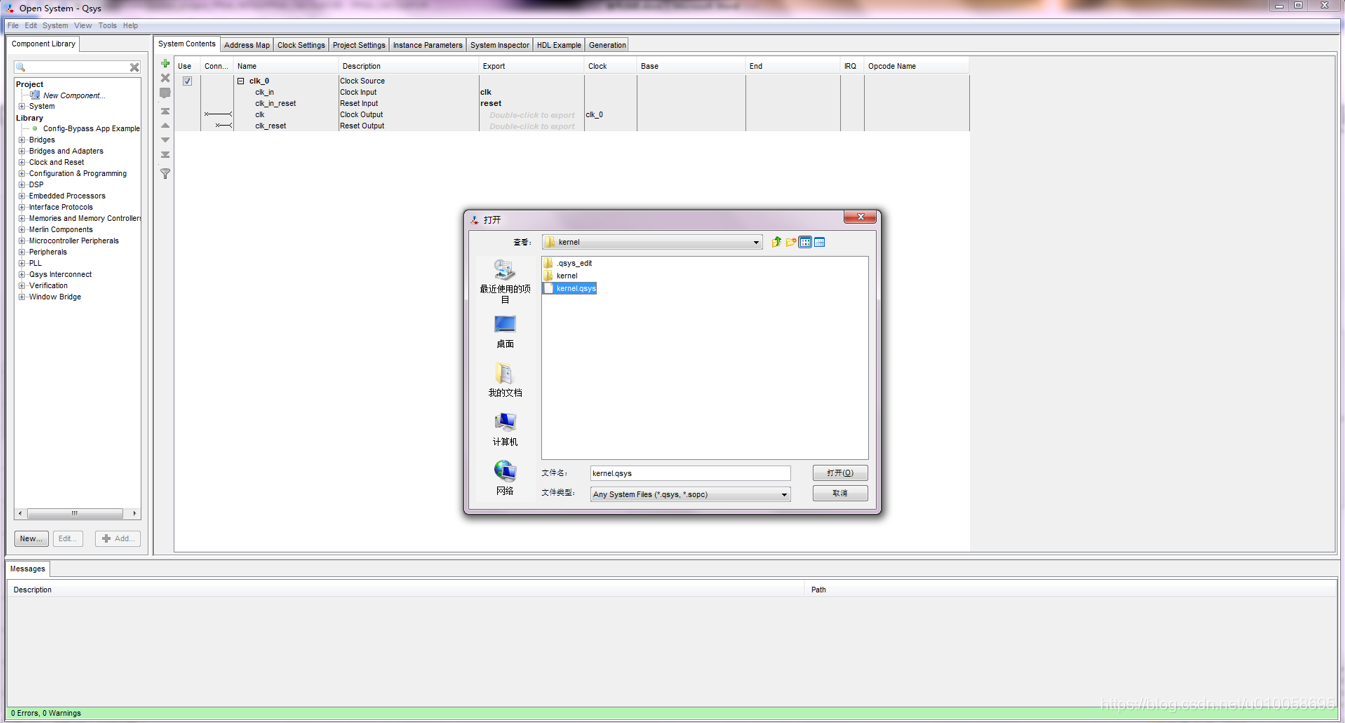
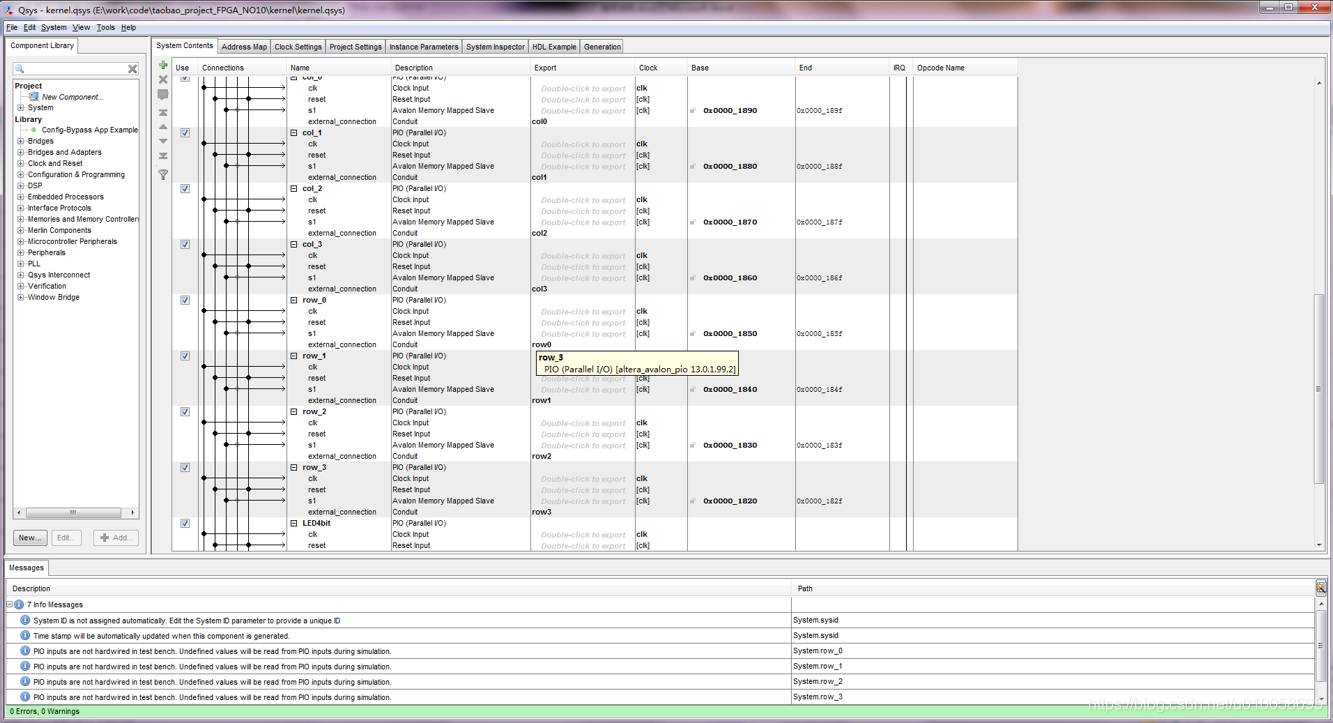
用quartus 13 打开FPGA_CACULATOR.qpf工程文件。Tools->Qsys 打开内核构建菜单:

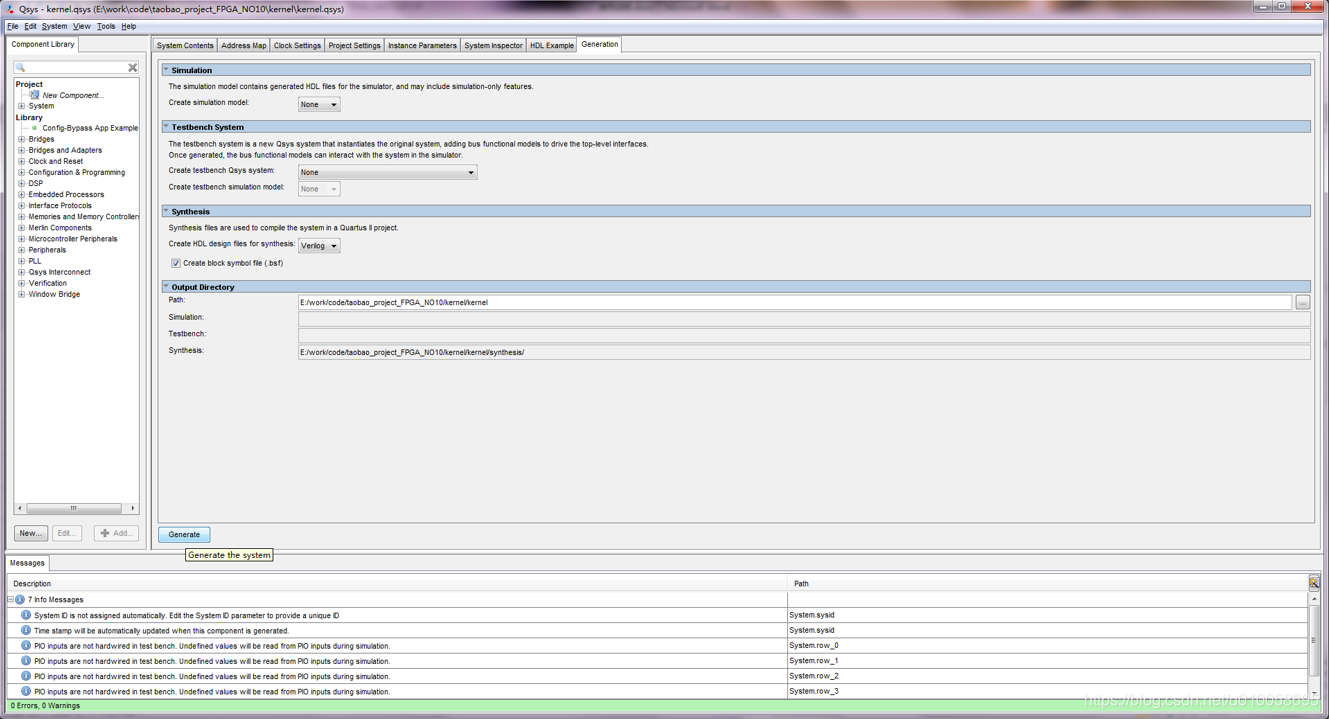
点击generation->generate生成内核文件:
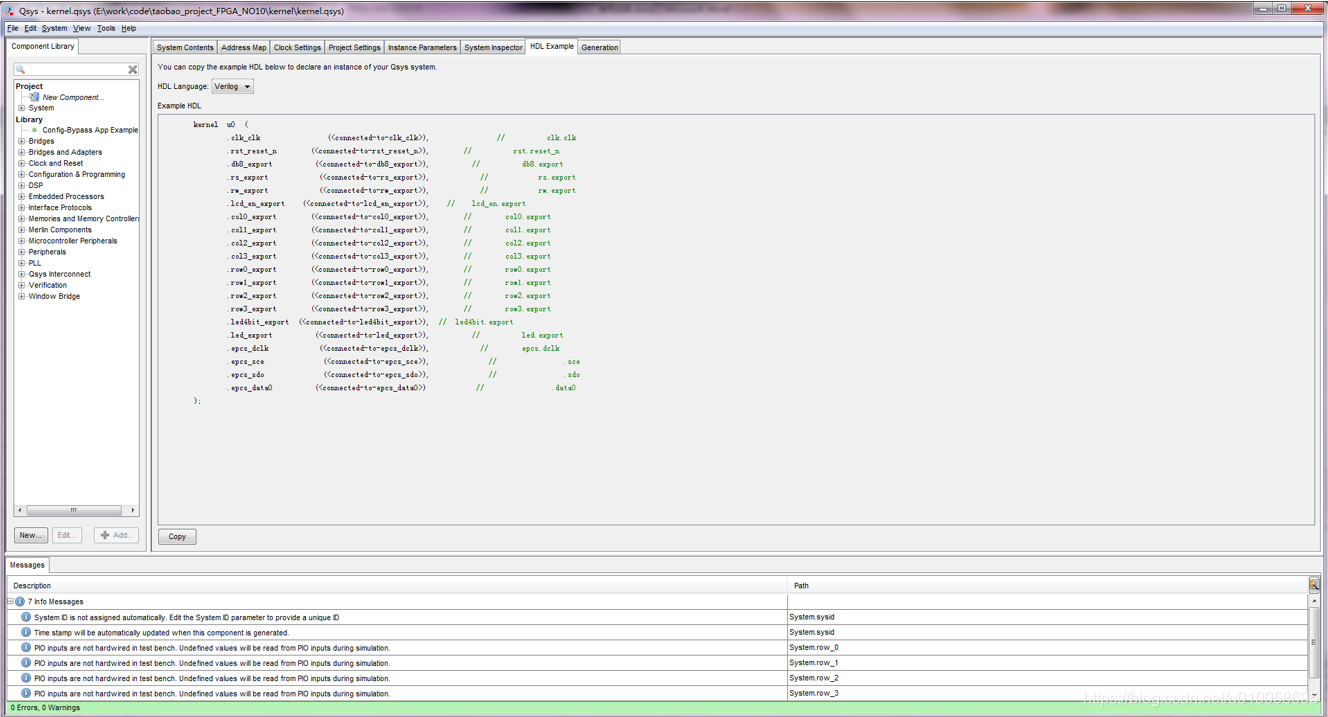
点击HDL Example->copy
建立顶层文件并例化NIOS2内核
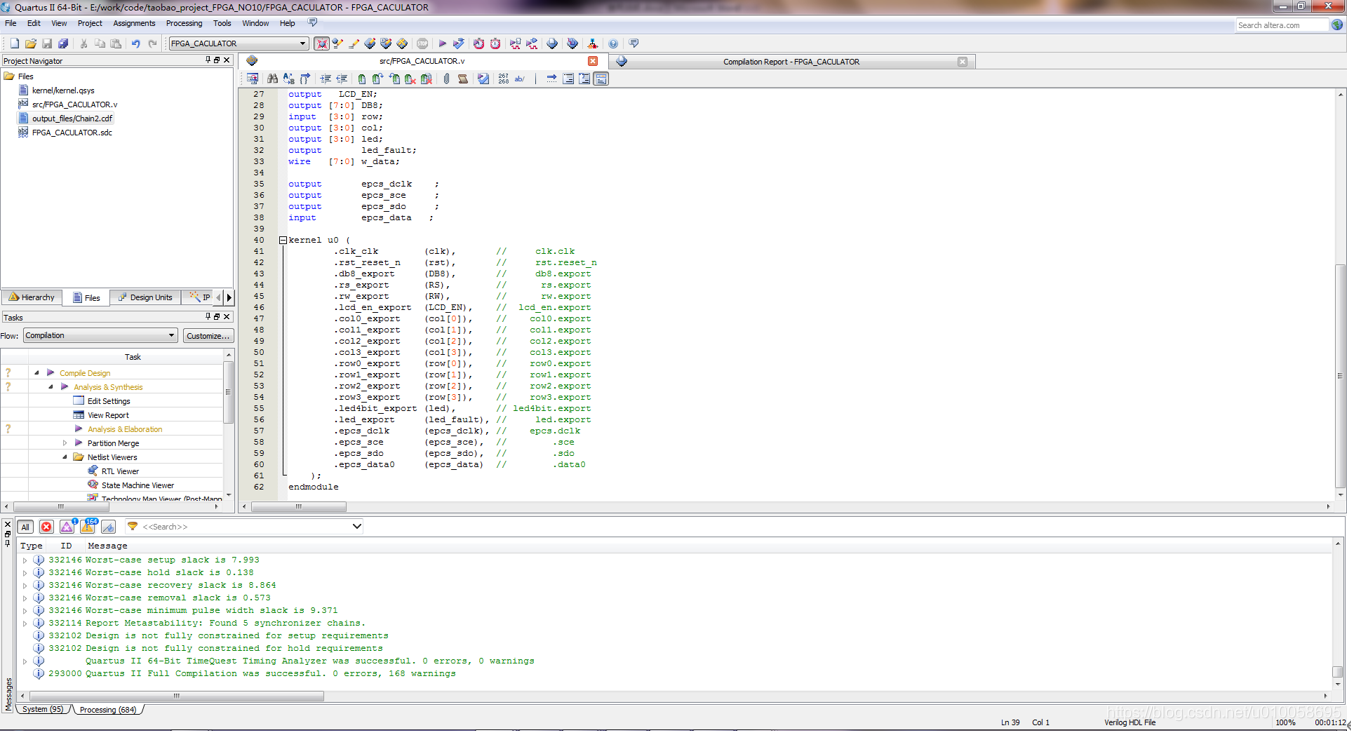
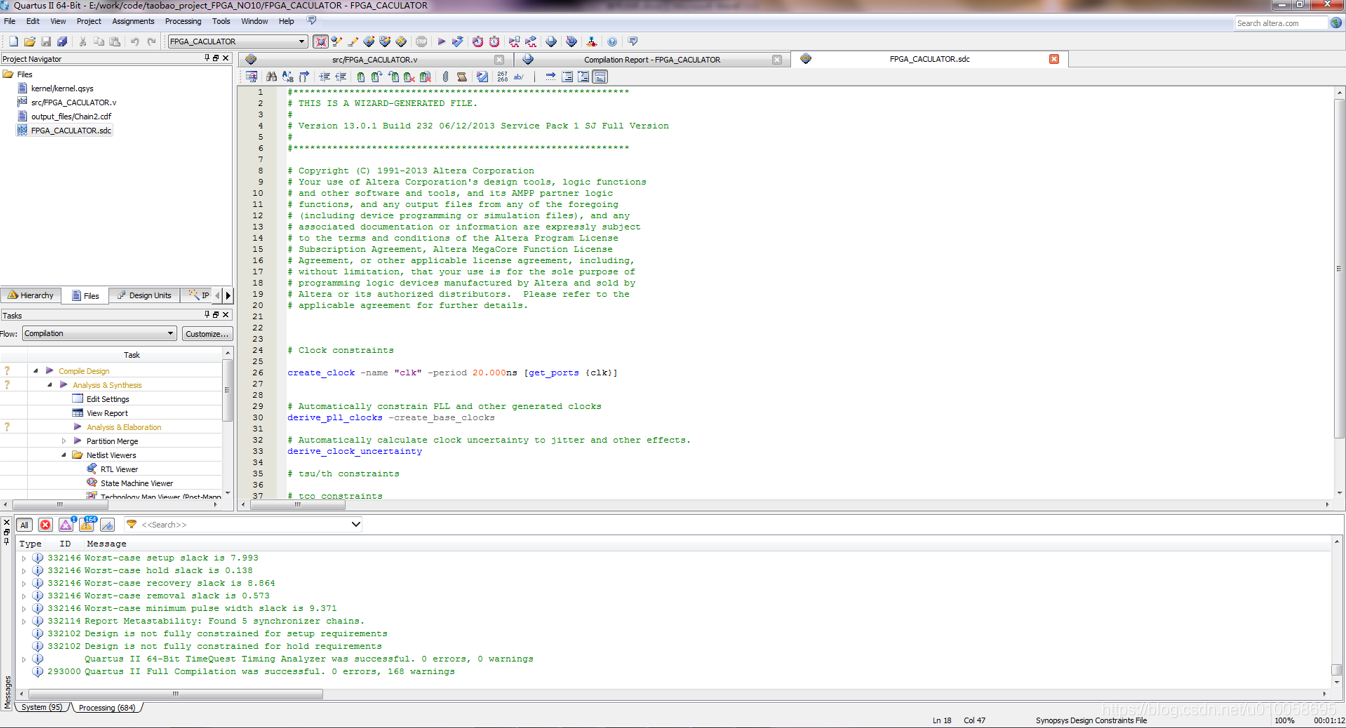
建立SDC约束
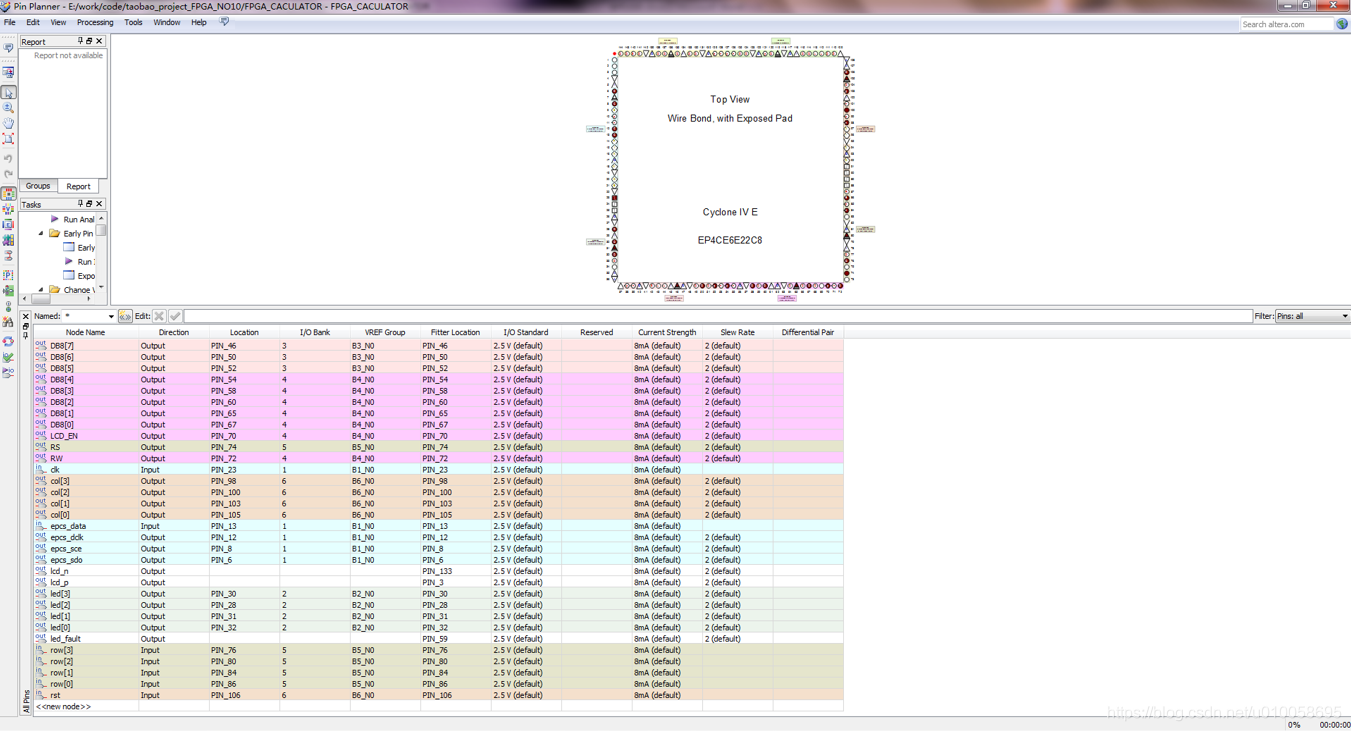
Pin planer 对信号进行管脚绑定:
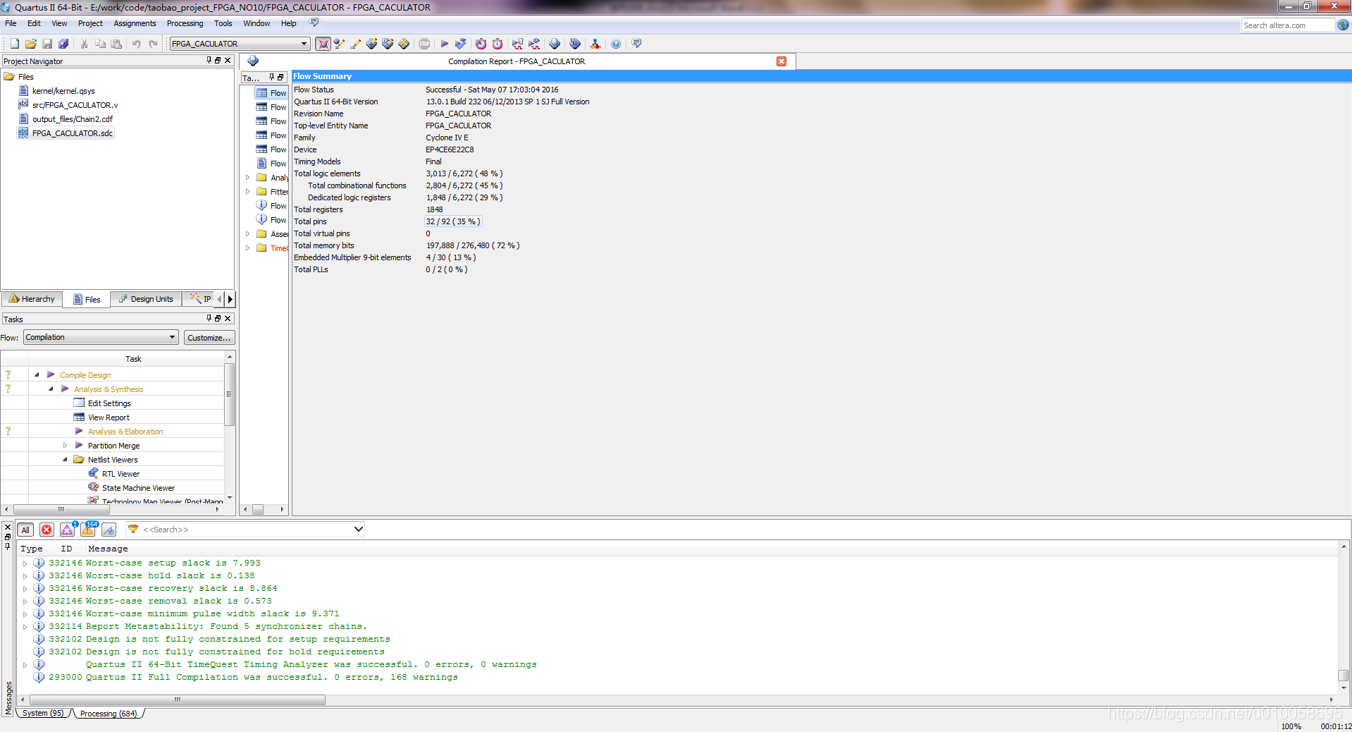
编译综合设计文件:
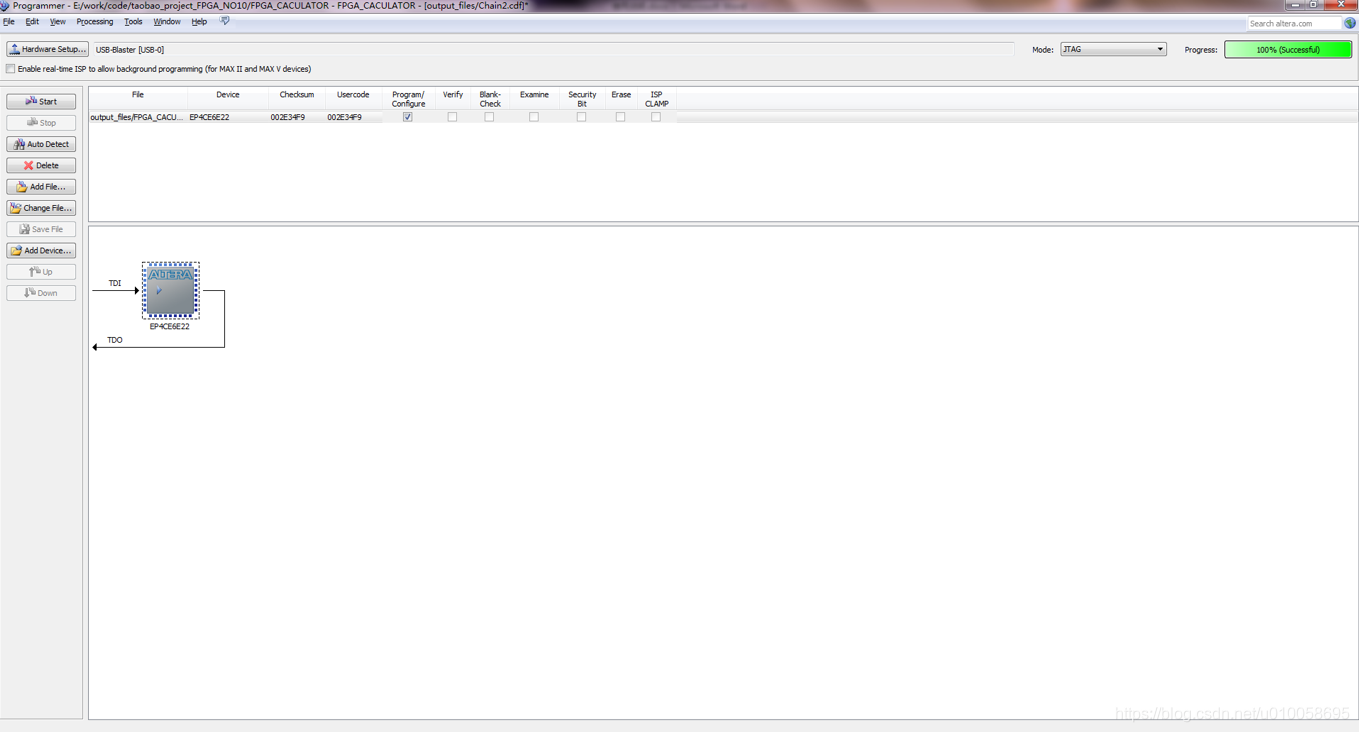
下载构建的NIOS文件到FPGA:
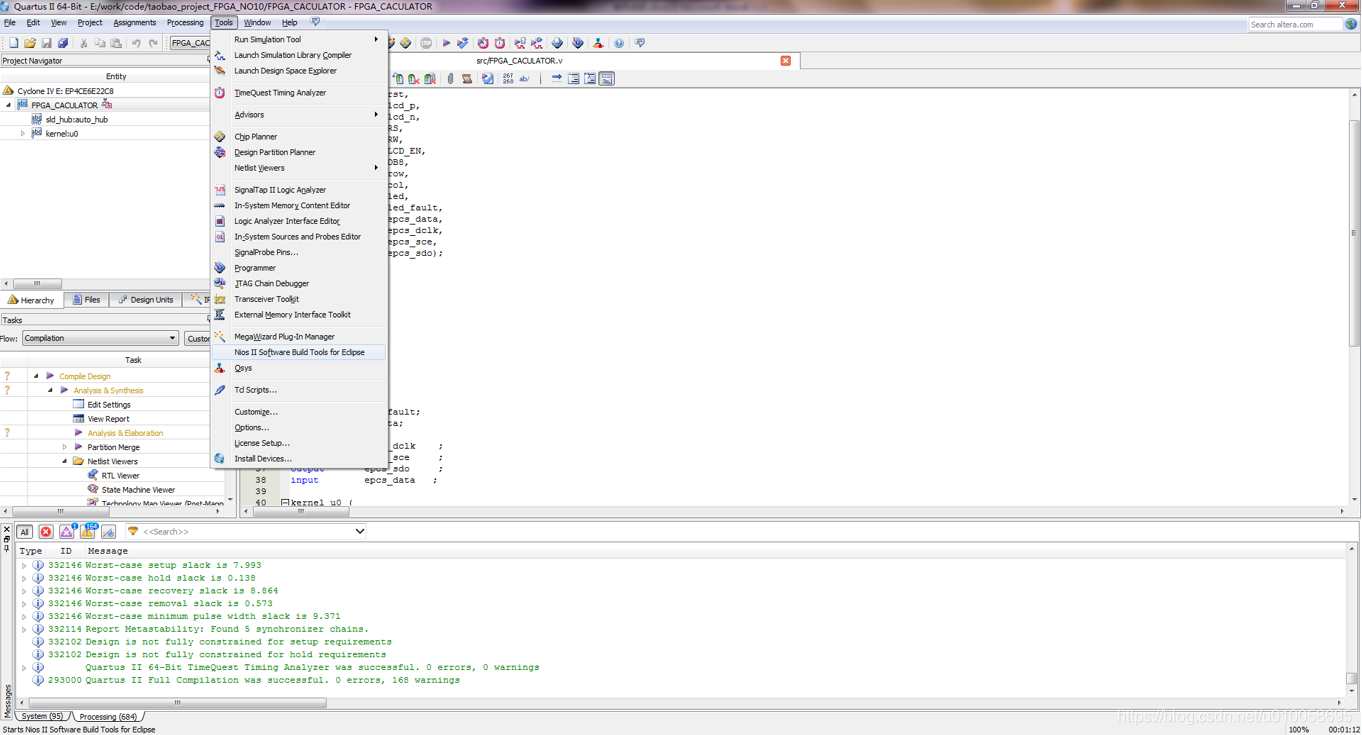
打开NIOS软核开发工具:NIOS II Software Build Tools for Eclipse
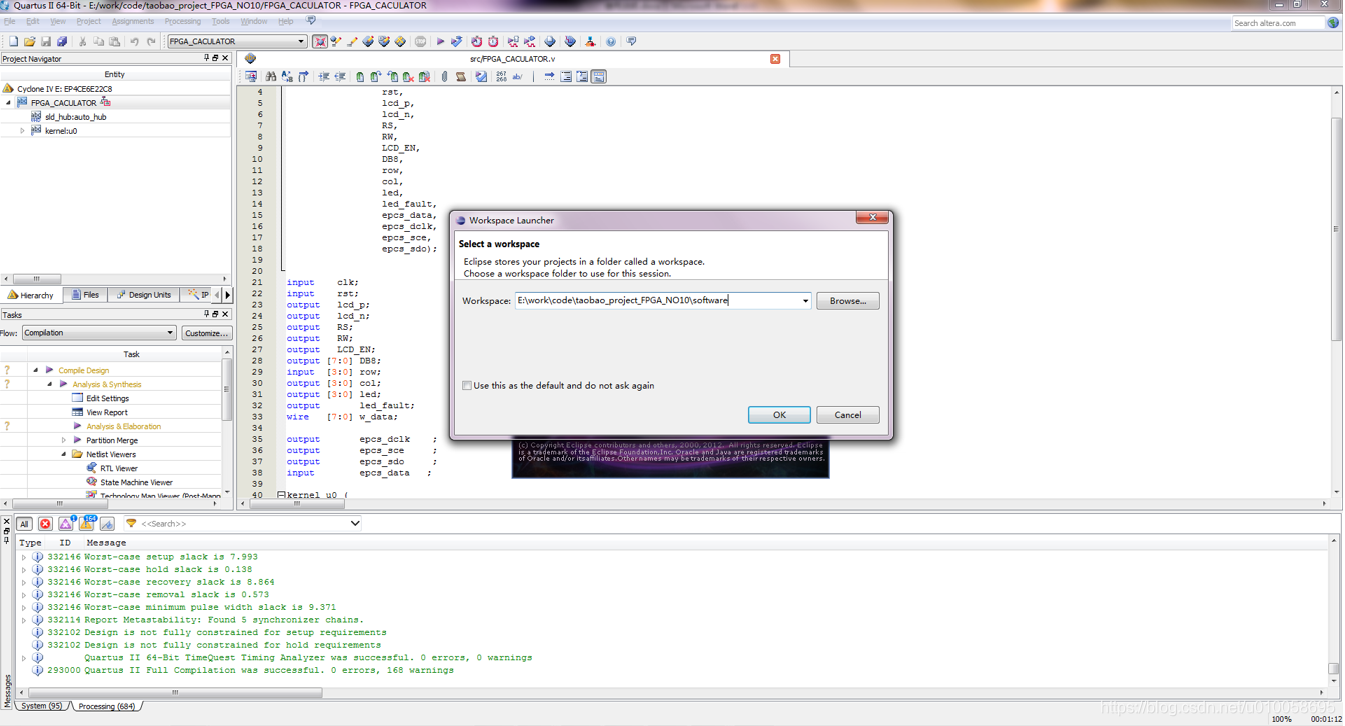
打开工程解压的位置并找到project_FPGA_NO10\software,工程位置不能有中文:
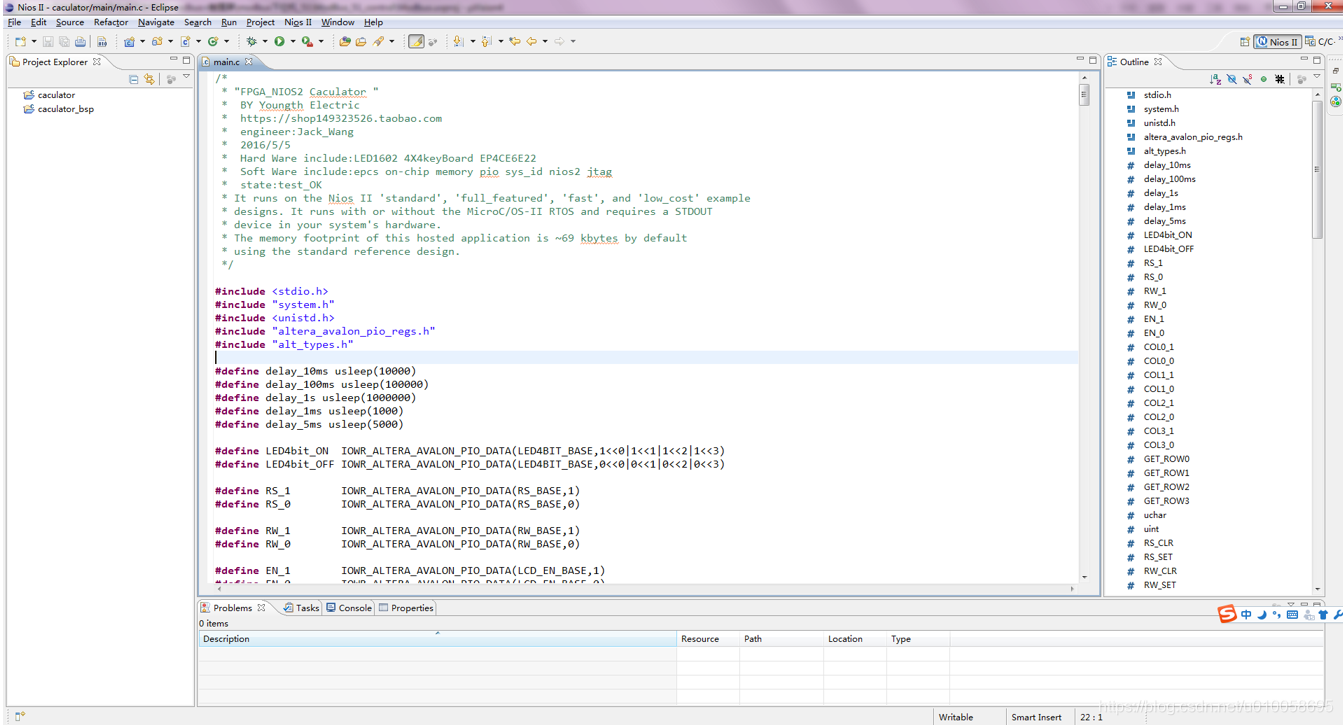
程序代码在main.c文件:
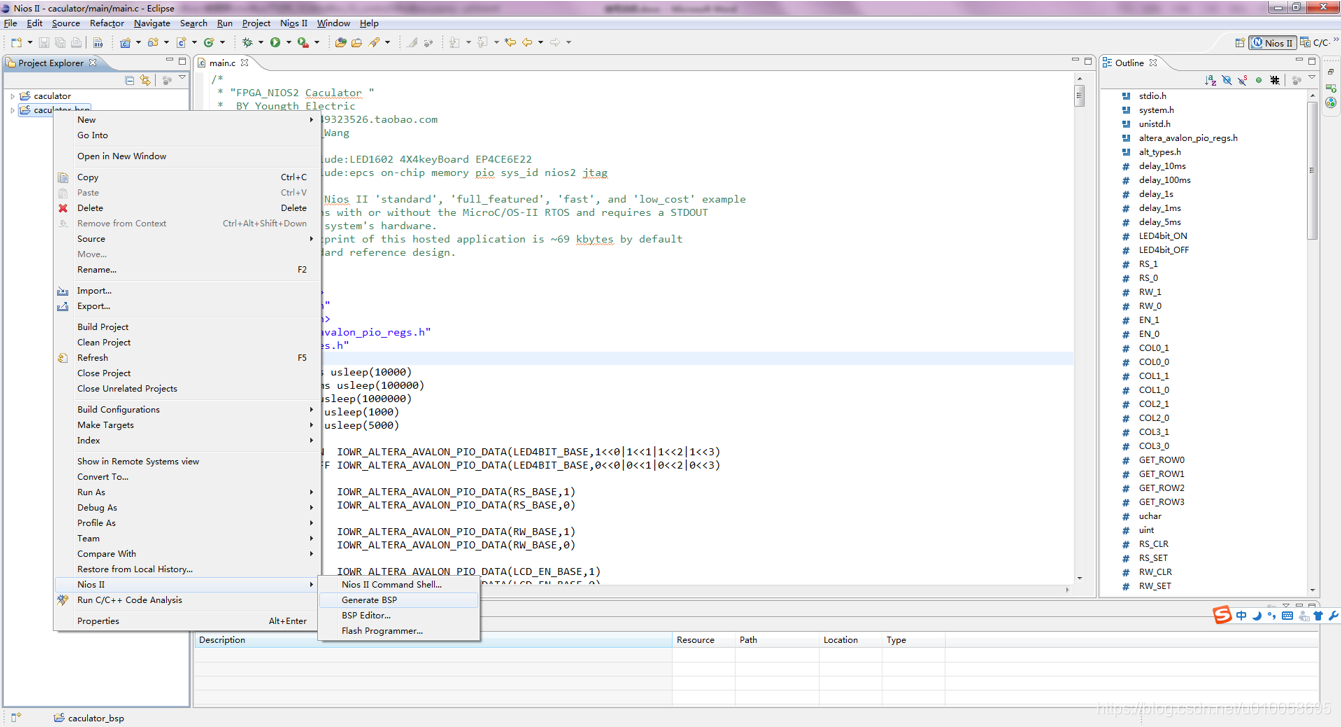
右键点击caculator_bsp->NIOS II->generate BSP 编译板级支持包和驱动代码:
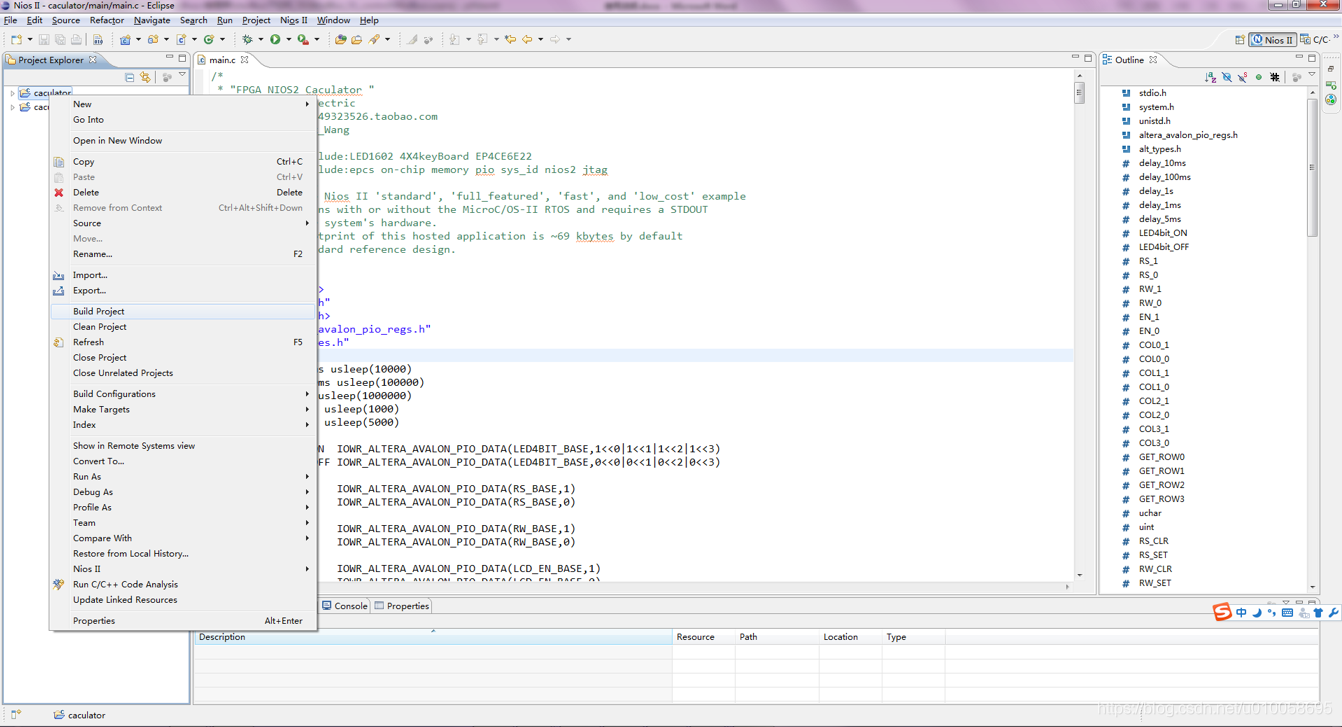
右键点击caculator->build project对代码进行编译:
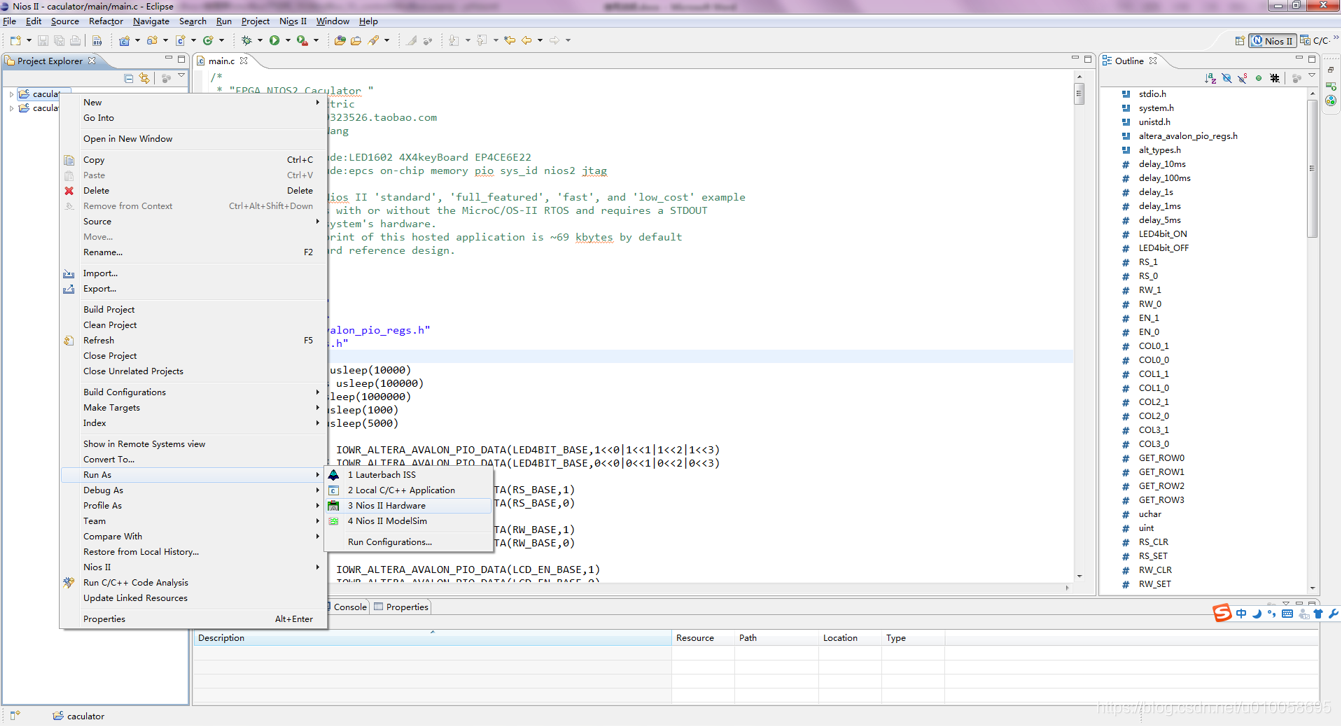
右键点击caculator->Run As->3 Nios II Hardware将代码下载到RAM中进行调试(断电丢失):
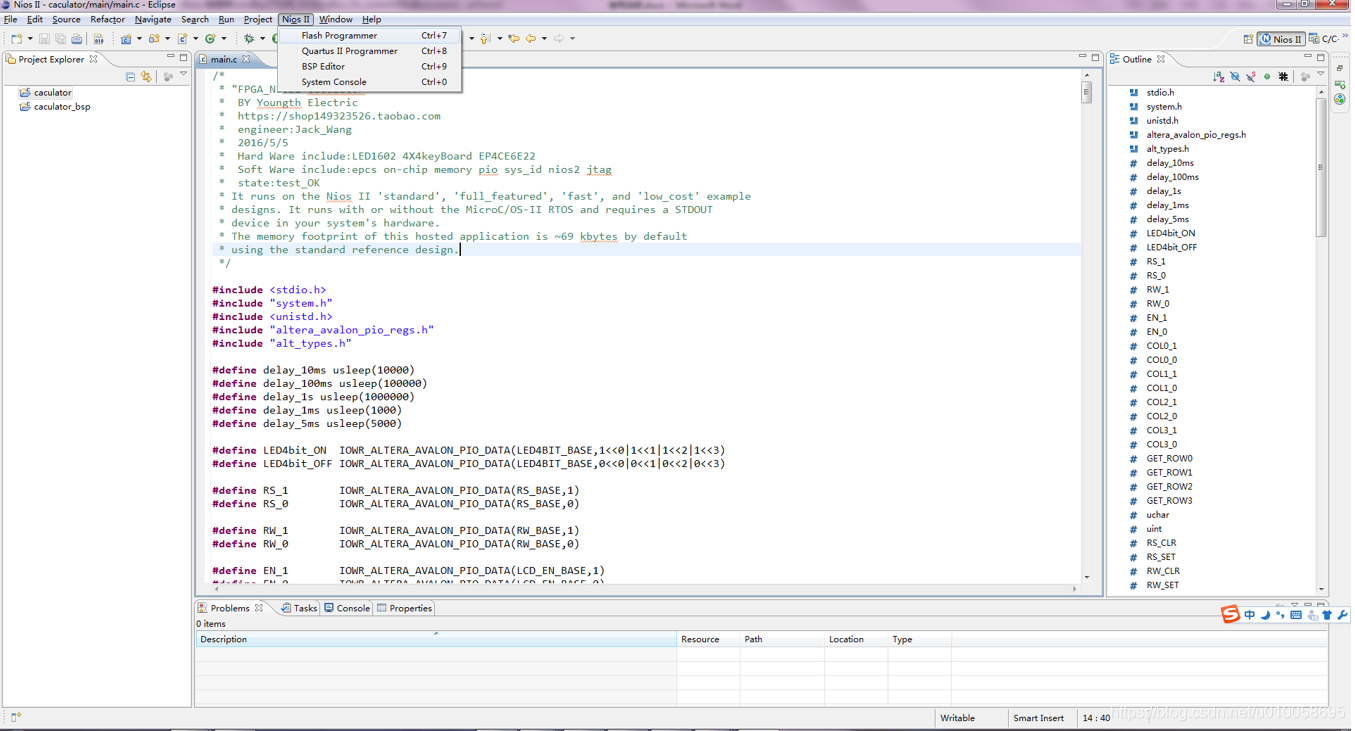
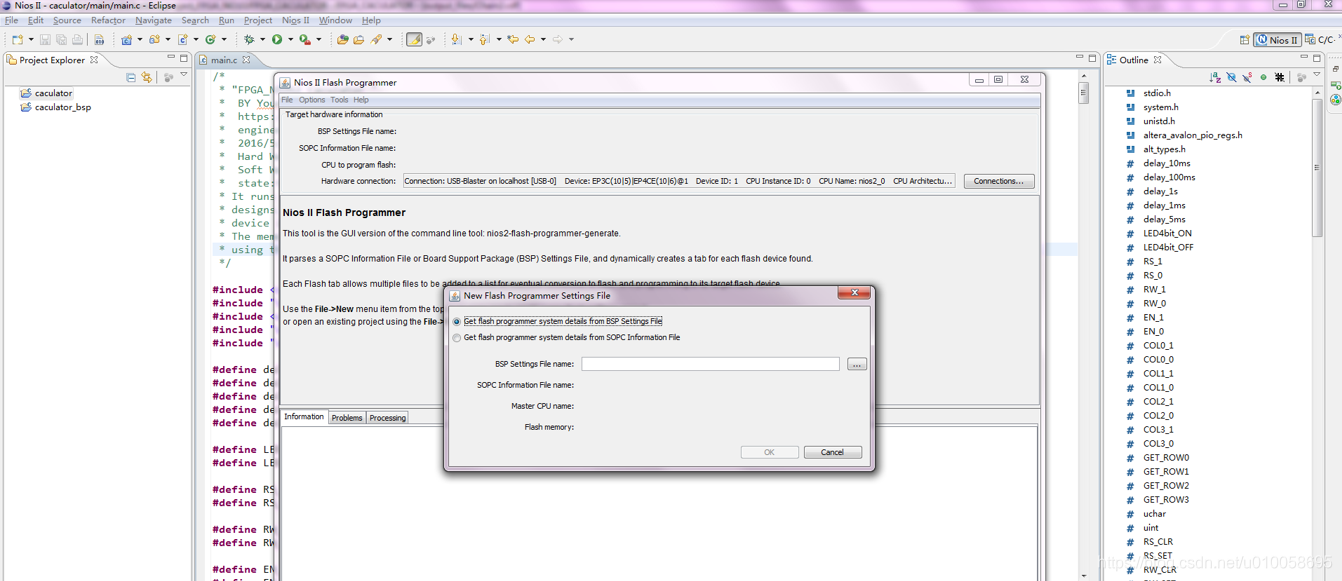
调试OK后,进行程序固化到FLASH配置芯片EPCS16,点击NIOS II->flash programmer:
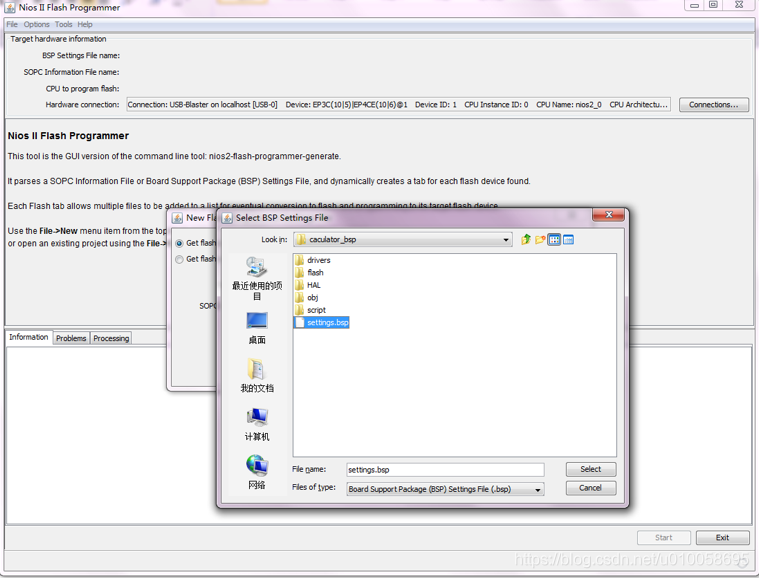
File->new->添加一个bsp文件,bsp文件在software\caculator_bsp下:
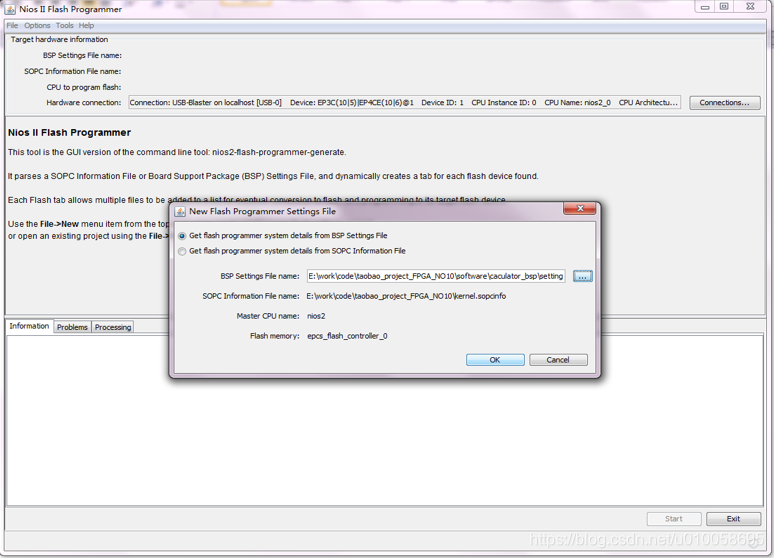
会自动读取内核配置文件,点击OK:
添加文件.sof和.elf:
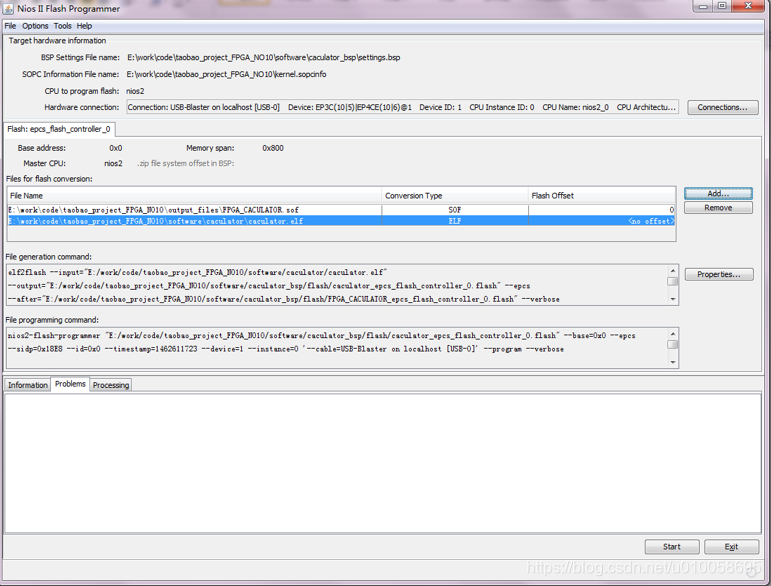
最后点击start即可开始固化程序。重新上电,可以看到程序以及固化在EPCS中了。